Showing posts with label methods II. Show all posts

Thursday, November 20, 2014

Shape Monsters

Topic: Identifying two dimensional shapes and patterns.

During the third lesson of my kindergarten mathematics unit, I was able to bring together shapes and patterns in a fun and creative way. We started out the day by reviewing the names of our shape friends (as seen previously seen here).


Next, we watched Bert and Ernie sing to us about patterns. We even danced and sang along! I was so relieved when students knew who they were... I was honestly nervous they would have no clue!


Once we sang and danced along with Bert and Ernie, we used a flipchart from Promethean Planet to help us visualize patterns. We started by identifying patterns by size, shape, or color. Next, we looked at some patterns and identified them. We also figured out how to extend patterns, and we created our own as a class! 


I wanted to integrate shapes and patterns together in this math lesson because I wanted to take the time to have students make their own shape monsters!


My example

I showed my students my example of a shape monster, and we counted the number of shapes I used together. As we counted, I recorded the correct number of each shape used on the little shape recording sheet. I also encouraged them to use patterns on their shape monsters. 

A collection of shape monster inspiration pictures I found on Pinterest.
These examples were projected on the Promethean Board as students worked.

I knew that this assessment would be very time consuming, so I made some modifications. Instead of having students cut out their own shapes and color them, I decided to make shape guide sheets to eliminate the coloring time. Creating shapes can be difficult to draw, but when a child developing their motor skills is asked to freely cut a shape out with scissors... hello, meltdown!  


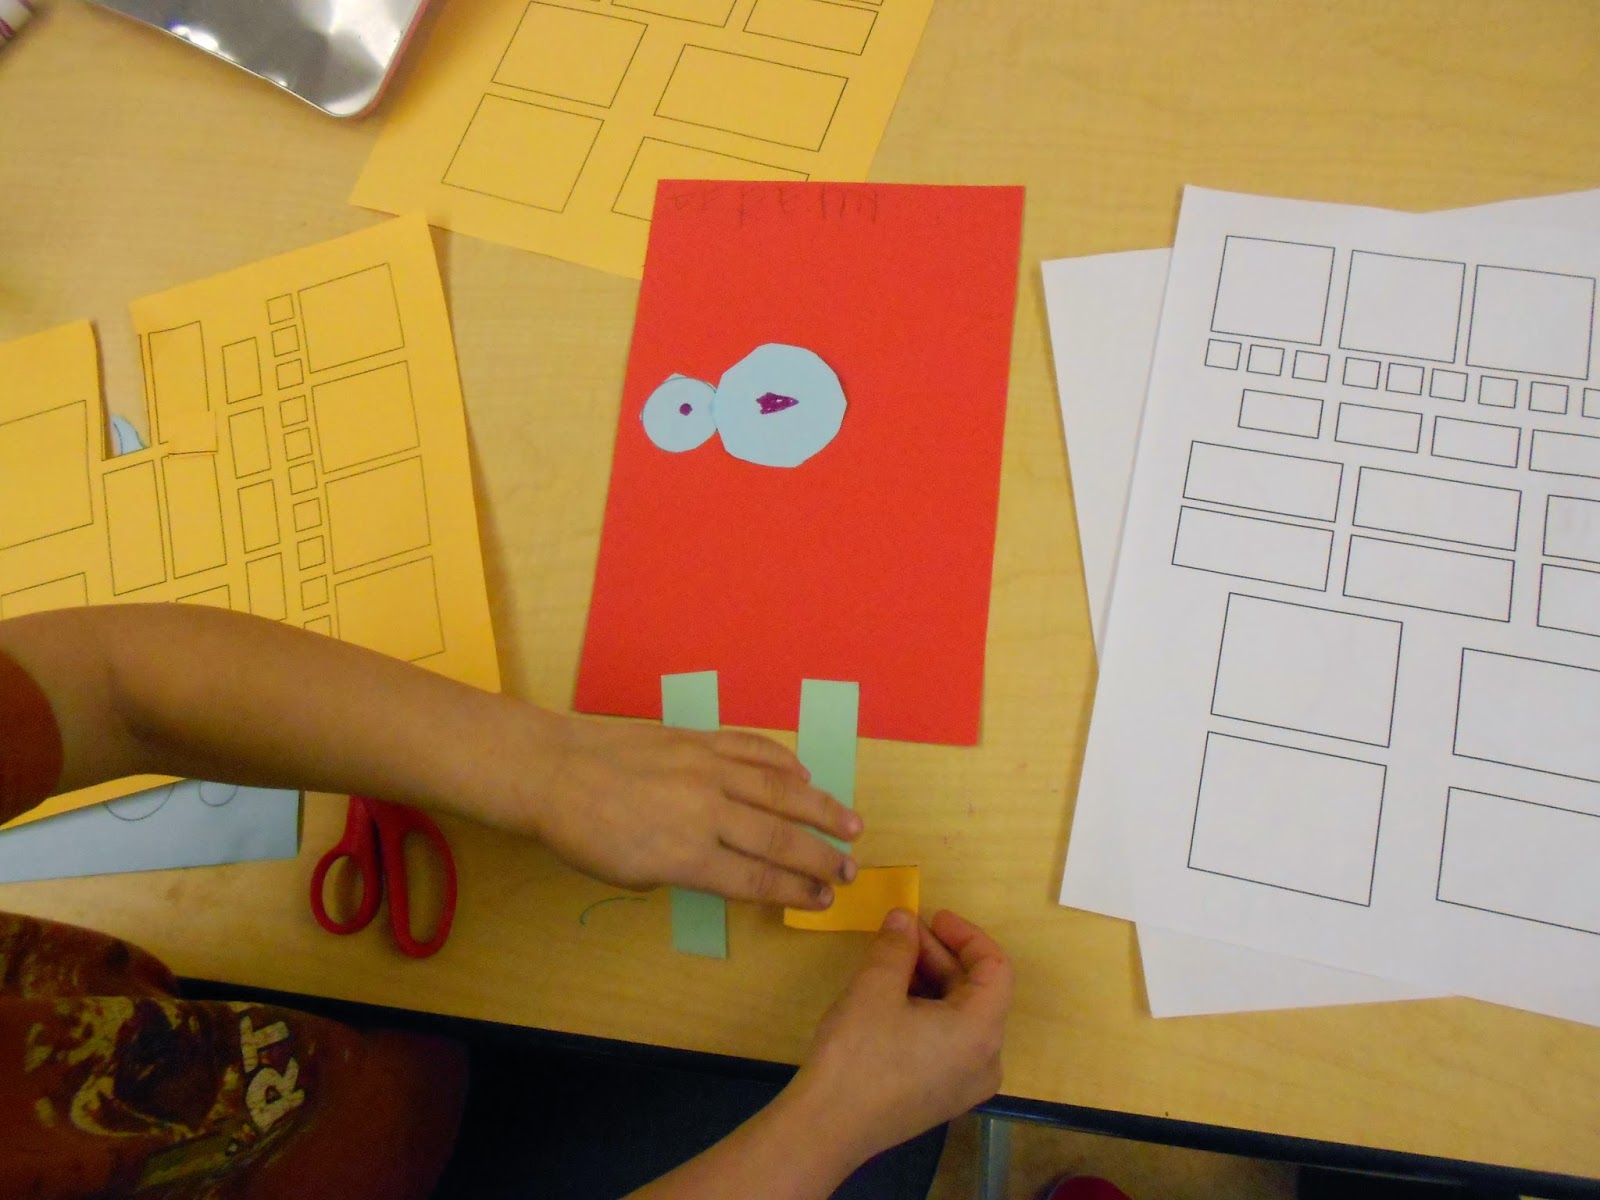
Here is a picture of all of the elements I gave students to help them create their monsters. I gave everyone a pre-cut red piece of construction paper in a rectangle shape for their monster bodies. All students also received two skinny green construction paper rectangles to use as legs. 


Little hands hard at work!
Students worked very hard on their shape monsters! There was a lot of cutting, gluing, and excited giggles as they began putting together their creations. Having all of the monsters have the same colors prevented a lot of upset kiddos who would have wanted a specific "pretty" color to work with.


For my mathematics project, I was required to create a rubric and hold an interview with students so I could assess their mathematical thought process. My job was to include a verbal, written, and demonstrative component into one assessment. Shape monsters were perfect for this purpose.


The overall goal of this assessment was to see if students could correctly identify two dimensional shapes. The written component took the form of the shape recording sheets, where students sat with me at my desk and counted up the total number of each shape (circle, triangle, rectangle, and square) they used to make their monster. Kindergarten students aren't writing yet, but they do know how to write their numbers! This also touched upon counting and cardinality - an ongoing unit for this age.


The verbal portion of this assessment was when I asked students to point to the shapes they used and name them correctly. This let me know which students were still struggling with shape identification. 

Finally, students were able to demonstrate their knowledge of shapes by using pattern block manipulatives. I took out a triangle and a square, and asked students if they were the same shape. When they told me no, I asked them to explain and show me why the shapes weren't the same. Students picked up the shapes, counted the sides with their fingers, and verbally expressed the differences between the two shapes. 

Source

My students didn't feel as though it was an assessment. I simply called each student over to my desk so that they could "tell me about their shape monsters," and they all had the biggest grins on their faces when they came over to talk!  They were so happy to get to tell me all about the shapes they used, and they loved showing off their monsters, I made sure I didn't seem like I was putting them in the "hot seat," but rather, just having a conversation. It worked well! 

This lesson gave me a better picture of where my students are in their learning of two-dimensional shapes, and it has helped me figure out the best way to introduce three-dimensional  I am so happy with how this lesson turned out, and students were so happy to take home their little shape monsters to show their families! 

Friday, November 7, 2014

Going Batty!

Topic: Two dimensional shapes

I can't tell you how excited I was when I realized I would be teaching on October 31st... Halloween! I wanted to incorporate the "holiday" into my lesson planning. For the past few weeks, we have been talking about identifying two dimensional shapes.We worked on identifying them, counting their sides, and creating them with Play-Doh.


It was obviously time to create a geometric bat out of circles, squares, triangles, and rectangles! I found a geometric shape worksheet from MathFour.com, and I used the geometric bat template for younger kids. I made copies of these worksheets and had students color in the shapes with a black crayon before cutting them out. Cutting is a big deal in kindergarten, so the kids were excited to work on that! 


I put this little visual up on the Promethean Board while students were working on their bats. I included a step-by-step diagram to put together the bats, which was really for all of the teachers in the room, because we needed to be on the same page when helping students! I also included a fun fact about bats to read to the students, because who doesn't love fun facts? I wasn't sure if they had seen what a real bat actually looks like, so I thought that would be a great visual to add to the board.


First, we colored and cut out our pieces. All kinders love to cut things out, but our rule is to have them place the objects in the correct positions and have them checked by a teacher before gluing them down. They do not like to wait at all. 


I decided to create an outline for students to follow, and I made plenty of copies for all students to have one. Without a template, this activity could be easily been too overwhelming for my kindergarten students. 


I loved walking around the room and watching students glue their bats together! They all did a wonderful job following directions and they were able to complete this complex task!


Once the bats were all glued and put together, I hot glued little googly eyes onto each one. I loved that we completed all of the components of the bat project before the Halloween party in the afternoon. Students were so happy to take them home and bring them to their parents!

Thursday, October 30, 2014

Shapes & Play-Doh Fun

Topic: Two dimensional shapes

Over the past few weeks, I have been watching the students play during their free time sessions at the end of the day and it shocked me that many of them were already creating patterns with unifix cubes and pattern blocks! Since the topic of shapes is one that children are "naturally" excited to learn about, I knew that I would have a lot of fun teaching these concepts to them! 


Question: On Wednesday, I began my introductory lesson to shapes. During the morning message and calendar session of the day, I asked students if they could give me the name of a shape. All of the students were able to name at least one shape, which was wonderful, and knowing students' prior knowledge before beginning my lesson was a great teaching tool. I was able to cater my lesson to the needs of my students by emphasizing the shapes that they hadn't mentioned.

Source


Greeting: Each morning we have a greeting during our Morning Meeting session. I used a blow up ball with shapes and uppercase letters on it to encourage students to greet one another by throwing the ball and looking to see where their right thumb lands on the ball. The students identified the two dimensional shape and  the uppercase letter that their thumb was touching. This was a very fun activity for them, and it gave me more insight as to which students were comfortable with shape identification, and which were not. 

Our shape friends proudly displayed in our classroom!

I began my lesson on shapes by introducing my kindergarten students to my shape friends. I found these wonderful shape posters and poems from the blog Miss Kindergarten, and they were a huge hit! Each shape has a cute name and a poem that describes them. The students waved to the shape characters and greeted them by name as I introduced them. It was adorable! These posters are currently displayed on our closet doors, as you see above, but we had a lot of fun passing them around while talking about them and counting their number of sides.


Source
Once I introduced the shape friends, it was time to read a book about them! I read The Greedy Triangle by Marilyn Burns, which is a wonderful book that illustrates how shapes are everywhere. It also introduces the concepts of sides and angles, because this greedy little triangle thinks he won't be happy unless he has just one more side and one more angle. Students watched in awe as the shape shifted from one shape to another by just adding one more side and one more angle each time.

I was shocked when I came upon the word 'quadrilateral' and students were able to use context clues in order to figure out  that a quadrilateral has four sides. We had a great discussion about how shapes can have four sides, and then we pointed to our shape friends to see which of them also had four sides.

Little hands working hard!
After our read aloud, it was time to start working with shapes!  I found these wonderful Play-Doh mats from the blog Life Over C's. They have an outline of the two dimensional shape on one side, a picture to relate the shape to on the other side, and a space for students to practice writing the name of the shape. I laminated these to use with Play-Doh, and I could easily give the students dry erase markers to trace the letters in the shape names later on in the year.


We rolled balls of Play-Doh into long strips to act as the sides we needed to use to create an outline of our shapes. After talking about the number of sides that certain shapes have, it was a lot of fun to create those sides individually with Play-Doh, and then connect them together on the mat outlines.


Some students had enough Play-Doh to fill in their shapes after they had finished the outline!


There were plenty of excited squeals and "A-Ha!" moments this afternoon as students related the shapes they were creating to the shape friends we had met earlier. Some students even ran over to the closet to point to which shape they had just made, and to see if it looked "just right."


Once they saw me with the camera, they began calling for me. "Ms. Preston! I'm done! Can you take a picture of it?" The answer was always: "Of course!"


As I saw students finishing up their shapes I would walk over and ask them, "Which shape did you just make?" The proud expressions on students' faces said it all - they knew exactly what shape they had made, and they were loving it. 


I would say that we learned a lot during our first shapes lesson! I can't wait for my next lesson, which falls on Halloween, when we use circles, squares, triangles, and rectangles to create geometric bats. It's easy to say that I'm obsessed with kindergarten lesson planning.


Tuesday, October 28, 2014

Trees & Pumpkins

Talking about trees in kindergarten has been a lot of fun! We spent time learning about what trees need to grow, and we even adopted our own tree in front of the school. So far, we have seen the leaves on this tree change from green, to bright red, and currently, there aren't any leaves left on it!


Source

We will be watching our tree throughout the seasons and we'll be drawing pictures in our tree books. Each page has a blank tree for us to color during each of the four seasons - showing that we know what happens to trees throughout their life cycles and the seasons. Students have loved coloring their trees to match the seasons.


Source
One sunny afternoon, we decided to go outside and see if we could find some little branches with leaves on them that we could use as our own model for a tree.


After a quick walk in the school's wooded backyard, each student came in with a snippet from a tree. We wanted a real representation of trees for students to touch and label. Bringing nature inside is always a wonderful option! 


With a little bit of hot glue, we were able to glue the little branches onto the papers for students to label. Since the branches didn't have roots, students had to draw them in at the bottom of the branch. We printed up little label cards, after realizing that having students try to copy the labels themselves would be too overwhelming. Students took their time gluing them onto the page and adding arrows. 


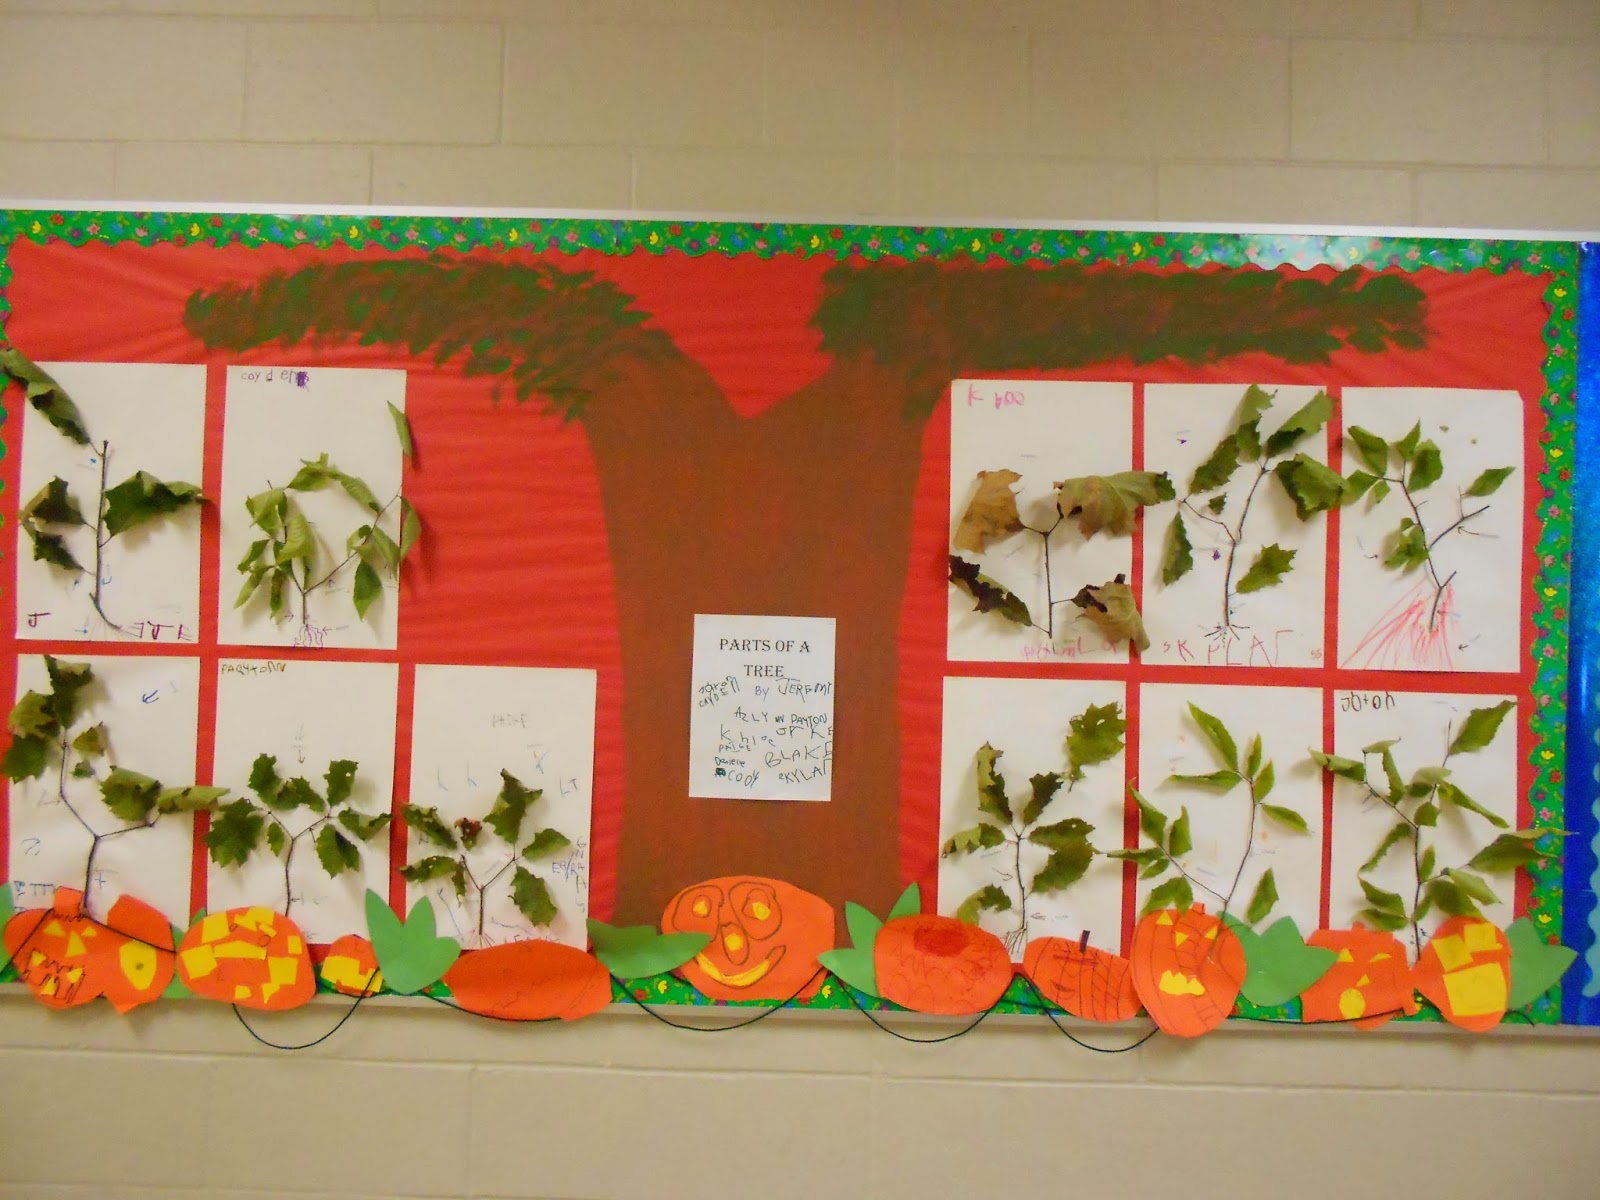
Here is the bulletin board I created with my cooperating teacher! We actually painted the tree onto the red background, and used a sponge to add leaves to the tree. All students' papers were stapled onto the board, and everyone marveled at how wonderful it came out! Students were also very proud of their work! 


Source
Since it's October, we put our tree unit on hold so that we could talk about pumpkins. We talked a lot about the life cycle of a pumpkin, and to illustrate the life cycle, we worked a cute pumpkin craft, as seen on Lindsy's blog Preschool Alphabet. The kinders loved making their own pumpkins and coloring the steps of the cycle themselves. We're still practicing cutting with scissors, and this activity was perfect for that! (Unfortunately, I don't have pictures of these masterpieces - they all went home to parents.)

We added our own jack-o-lanterns to our tree bulletin board.

We took a trip to a local farm in the area, Stonewall Farm, where we went on a wonderful horse-drawn hayride and learned how to make apple cider one apple at a time! We also had a chance to meet the Great Pumpkin who taught us about the life cycle of a pumpkin! Hearing it from the Great Pumpkin instead of Ms. Preston definitely solidified the experience for the students.

Our own little pumpkin patch!
We brought pumpkins and trees together by creating jack-o-lanterns in the classroom. We lined our bulletin board with our own little pumpkin patch on a vine.


Friday, October 10, 2014

Butterflies and the Letter B

Kindergarten is well under way, and we have spent our time focusing on classroom expectations and getting to know one another.

We have been finishing up our first science unit on Monarch butterflies, and the students had so much fun learning about them! Unfortunately, we have not been able to find any milkweed plants with eggs on them, so we do not have a little caterpillar to watch this year in our classroom. That hasn't stopped us from bringing the lives of butterflies into our room!

I love spending my time searching for lesson plans on Pinterest. I found an adorable picture of the edible butterfly life cycle that was posted by Tracy from My Little Yellow Room, and I knew that I had to recreate it with my students! I sent it to my cooperating teacher and she surprised me the very next day by bringing in all of the edible supplies in so that I could teach it that morning! I was thrilled!

Here is what we used:

  • 1 mini marshmallow for the egg
  • 1 sour gummy worm for the caterpillar
  • 1 green Tootsie Roll for the chrysalis
  • 1 butterfly cracker for the butterfly


I sectioned off the paper plates into four spaces, and told the students that we were going to create the butterfly life cycle. I gave them one food item at a time, and explained what it represented in regards to the life cycle steps. The students LOVED it! They liked when I pulled out a piece of candy and held it up, asking them which part of the cycle it represented; all students were able to answer correctly and confidently, which was a joy to see.

It was so fun to make (and eat) this activity! I loved the hands-on aspect of it, and the students loved being able to eat candy in the morning. (Notice how there's only one piece of candy in each slot. Not a mistake by any means...)

Source

We also continued our science unit into our letter sounds and identification. Our letter of the week was "B" through the LETRS program. We spent time talking about words we know that start with the letter B, and the sound that the letter makes. One of my favorite activities, however, was the butterfly B's that we created together one morning!

Ms. Preston's butterfly B!
This idea came straight from Pinterest, and it originated from crystalandcomp.com. This activity was very easy to do with students, but it needed a lot of prep time before we were able to bring it into the classroom!

To create this craft, you will need:
  • Black construction paper
  • Rolls of contact paper
  • Cut up squares of tissue paper
  • Scotch tape

Once we created a template for the butterfly B, it was time to cut them out and get them ready for students. Before students came into the classroom during morning recess, we went around to each table and placed a sticky-side up piece of contact paper to their desks with Scotch tape. After that was completed, we plopped down the black construction paper B templates onto the contact paper, and smoothed it out to make sure it would stay flat.


It was very tricky to keep little fingers off of the sticky contact paper, but once we let them have the pieces of tissue paper, they were so happy to get started! When students left to attend their specials, we rushed around to place the other piece of contact paper down onto the butterflies to seal the tissue paper creations. We spent time cutting them out, and surprised the students by taping them onto the windows as beautiful sun catchers.


I absolutely love being able to bring hands-on activities in the classroom instead of distributing worksheets. There was a lot of learning going on in kindergarten and the students seemed to enjoy every minute of it!